Let’s be real – even with a top-of-the-line 3D printer, getting consistently great prints takes more than just expensive hardware. It’s about technique, understanding your machine, and developing a bit of printer intuition.
3D printing has quickly revolutionized the way we create, prototype, and manufacture products. More and more printers are coming out on the hobbyist market and in various sizes. However, even with the most advanced printers out there, they require a common set of techniques to achieve optimal results. Whether you are plagued with first layer adhesion issues, accuracy in quality, or strength of your print, implementing these proven techniques will accelerate your printing experience. We’ve compiles these essential tips based on our countless printing hours, research, and feedback to help you achieve a more professional quality print.
1. Perfect Your Print Bed Leveling
The foundation of any great 3D print is – literally – the foundation. An uneven print bed is the number one culprit behind failed prints.
What Can Go Wrong
- Too far from the bed? You’ll get sad, stringy “spaghetti” prints
- Too close? You’ll scrape your bed or create weird “elephant’s foot” bottom layers
Implementation Strategies
- Use the paper method for manual leveling: This method is also known as tramming. A lot of sites will say “The nozzle should be close enough to create slight resistance when sliding a standard piece of paper between the nozzle and bed.”
- This makes sense, but when I was new to 3D printing, I erred on the side of caution and wasn’t getting close enough.
- My suggestion is that with the paper between the nozzle and the bed to dial it to the point the paper won’t move and then back it off slightly. This should lead to free movement of the paper. The paper should be able to fully glide out of the path of the nozzle and back under without jamming. This has led to the smoothest first layers for me.
- Invest in auto bed-leveling: Systems like BLTouch, CR-Touch, or inductive sensors create a height map of your bed and compensate for small imperfections.
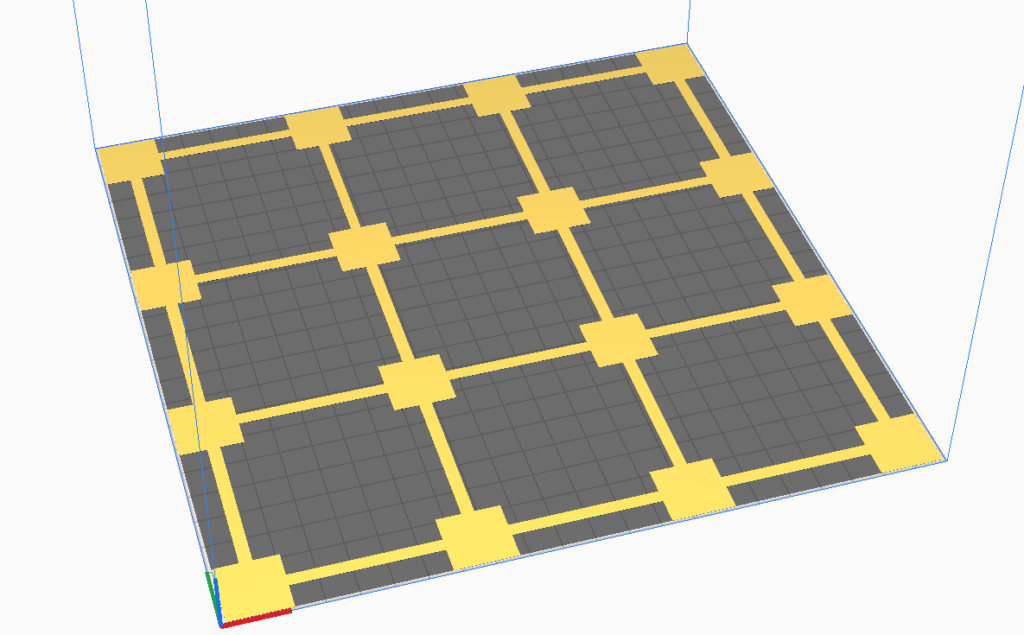
- We have the Ender 3 S1 Pro which comes with the CR-Touch. With the latest software this the display will show all 16 points that the CR Touch measures, and you have the option to save that mapping.
- Level while heated: Always level your bed at printing temperature to account for thermal expansion.
- I typically will do a single tram session on the cold bed if I’ve severely messed with the spring adjustments.
- Once the bed is close, I heat it up to 60 degrees Celsius this is the recommended temperature for PLA and what I print most often.
- Check level regularly: Vibration and regular use can throw off your bed level over time.
- After a recent mishap I have a calendar reminder for a monthly tramming.
Pro Tip
For the best results, I always use a 4 x 4 bed level test print to make sure the 16 points are good. I also set a g-code to auto-level before each print after the bed has been heated.
Check out our post on Bed Leveling
2. Optimize Nozzle Temperature
Temperature isn’t just a number – it’s the secret sauce of great 3D printing.
Temperature Ranges for Common Filaments
- PLA: 190-220°C
- PETG: 230-250°C
- ABS: 230-255°C
- TPU: 220-235°C
- Nylon: 240-270°C
Smart Temperature Strategies
- Always start with manufacturer recommendations
- Use temperature towers to find the sweet spot
- Remember that different colors and brands might need slight temperature adjustments
- Keep a log of what works for each filament
Check out our post on Filament Settings
3. Calibrate Your Extruder
Think of extruder calibration like tuning an instrument – precision matters.
Why Calibration is Critical
- Prevents under and over-extrusion
- Ensures consistent layer thickness
- Improves overall print strength
Calibration Techniques
- Perform E-step calibration regularly
- Measure actual filament consumption vs. expected
- Adjust flow rates for different materials
- Re-calibrate after changing nozzles
Pro Tip
For maximum precision, perform your E-step calibration with the hot end at printing temperature but disconnected from the nozzle (allowing the filament to flow freely without back-pressure).
4. Strategic Print Speed Adjustments
Faster isn’t always better. Smart speed management can significantly improve print quality.
Recommended Speed Ranges
- First Layer: 15-25mm/s
- Outer Walls: 30-40mm/s
- Inner Walls: 40-60mm/s
- Infill: 60-100mm/s
- Supports: 60-120mm/s
Speed Optimization Tips
- Slow down for outer walls and small details
- Speed up infill printing
- Consider acceleration and jerk settings
Recommended Speed Ranges by Feature
- First Layer: 15-25mm/s
- Outer Walls: 30-40mm/s
- Inner Walls: 40-60mm/s
- Infill: 60-100mm/s
- Supports: 60-120mm/s
Pro Tip
Check your printer manufacture for their recommended settings.
5. Master Cooling Techniques
Proper cooling can make or break your prints, but the optimal approach varies significantly by material.
Why It Matters
Cooling can make or break your prints, depending on the material.
Material-Specific Cooling
- PLA: 80-100% fan speed after first few layers
- ABS: Minimal cooling (0-20%), use an enclosure
- PETG: Moderate cooling (30-50%)
Pro Tip
For small layers with minimal surface area, enable “minimum layer time” in your slicer (usually 5-10 seconds). This slows down printing for these layers, allowing proper cooling before the next layer begins.
6. Proper Filament Storage and Drying
Filament is hygroscopic, meaning it absorbs moisture from the air, which significantly impacts print quality.
Why It Matters
Moisture-contaminated filament creates popping sounds during extrusion, resulting in rough surfaces, weak layer adhesion, inconsistent extrusion, and even nozzle clogs.
Recommended Strategies
- Store filament in airtight containers: Use vacuum-sealed bags or containers with desiccant.
- The most common desiccant is Silica Gel.
- Consider a filament dryer: Purpose-built dryers or food dehydrators can restore damp filament.
- We currently use the Polymaker Dryer and Box. You can also print from inside the box allowing you to keep your filament dryer longer.
- Learn material-specific storage needs: Nylon and TPU are extremely hygroscopic, while PLA and PETG are moderately affected.
- Listen for sizzling sounds: This audible indicator suggests your filament has absorbed moisture.
- Monitor humidity indicators: Place humidity indicator cards in storage containers to monitor conditions.
- The Polybox from Polymaker comes with a digitial indicator and color changing silica gel.
Drying Temperature Guidelines
- PLA: 45-50°C for 4-6 hours
- PETG: 65-70°C for 3-4 hours
- ABS: 80-85°C for 4 hours
- TPU: 50-55°C for 4-6 hours
- Nylon: 75-85°C for 8-12 hours
Pro Tip
Make sure you compare the above guidelines with the dryers’ settings.
What our video on setting up the Polybox
7-10. Quick Pro Tips
SSupport Structures
- Use support roofs and floors
- Try tree supports for easier removal
- Strategically orient models to minimize supports
Filament Storage
- Use airtight containers with desiccant
- Dry filament before use
- Monitor humidity levels
Retraction Settings
- Adjust based on extruder type
- Enable Z-hop for detailed prints
- Use combing mode
First Layer Perfection
- Increase first layer width
- Use appropriate bed surfaces
- Clean bed thoroughly
Regular Maintenance
- Create a maintenance calendar
- Clean and lubricate components
- Check belt tension
- Update firmware
The Real Secret: Consistency
3D printing is part science, part art. These tips provide a solid foundation, but true mastery comes from practice, patience, and continuous learning.
Remember: Document your settings, make incremental adjustments, and don’t be afraid to experiment!

